Sunday, 17 November 2013

LIST OF RICHEST/POOREST COUNTRIES IN THE WORLD 2013 (Yearly/Capital Income)

LIST OF RICHEST COUNTRIES IN THE WORLD 2013.


1 Qatar $106,283.96

2 Luxembourg $79,649.49

3 Singapore $61,046.96

4 Norway $54,479.06

5 Hong Kong SAR $50,716.14

6 Brunei Darussalam $50,440.03

7 United States $49,601.41

8 United Arab Emirates $48,434.60

9 Switzerland $44,015.97

10 Kuwait $43,773.88


LIST OF POOREST COUNTRIES IN THE WORLD 2013.


1 Madagascar $948.86

2 Togo $926.67

3 Malawi $882.67

4 Niger $863.46

5 Central African Republic $789.21

6 Eritrea $776.98

7 Burundi $639.51

8 Zimbabwe $516.47

9 Liberia $490.41

10 Democratic Republic of Congo $364.48


Saturday, 26 October 2013

Friday, 18 October 2013

SQL commands (USEFUL FOR PROGRAMMERS)

ABORT — abort the current transaction

ALTER DATABASE — change a database

ALTER GROUP — add users to a group or remove users from a group

ALTER TABLE — change the definition of a table

ALTER TRIGGER — change the definition of a trigger

ALTER USER — change a database user account

ANALYZE — collect statistics about a database

BEGIN — start a transaction block

CHECKPOINT — force a transaction log checkpoint

CLOSE — close a cursor

CLUSTER — cluster a table according to an index

COMMENT — define or change the comment of an object

COMMIT — commit the current transaction

COPY — copy data between files and tables

CREATE AGGREGATE — define a new aggregate function

visit smarttricks.net for more tricks.

CREATE CAST — define a user-defined cast

CREATE CONSTRAINT TRIGGER — define a new constraint trigger

CREATE CONVERSION — define a user-defined conversion

CREATE DATABASE — create a new database

CREATE DOMAIN — define a new domain

CREATE FUNCTION — define a new function

CREATE GROUP — define a new user group

CREATE INDEX — define a new index

CREATE LANGUAGE — define a new procedural language

CREATE OPERATOR — define a new operator

CREATE OPERATOR CLASS — define a new operator class for indexes

CREATE RULE — define a new rewrite rule

CREATE SCHEMA — define a new schema

CREATE SEQUENCE — define a new sequence generator

CREATE TABLE — define a new table

CREATE TABLE AS — create a new table from the results of a query

CREATE TRIGGER — define a new trigger

CREATE TYPE — define a new data type

CREATE USER — define a new database user account

CREATE VIEW — define a new view

DEALLOCATE — remove a prepared query

DECLARE — define a cursor

visit smarttricks.net for more tricks.

DELETE — delete rows of a table

DROP AGGREGATE — remove a user-defined aggregate function

DROP CAST — remove a user-defined cast

DROP CONVERSION — remove a user-defined conversion

DROP DATABASE — remove a database

DROP DOMAIN — remove a user-defined domain

DROP FUNCTION — remove a user-defined function

DROP GROUP — remove a user group

DROP INDEX — remove an index

DROP LANGUAGE — remove a user-defined procedural language

DROP OPERATOR — remove a user-defined operator

DROP OPERATOR CLASS — remove a user-defined operator class

DROP RULE — remove a rewrite rule

DROP SCHEMA — remove a schema

DROP SEQUENCE — remove a sequence

DROP TABLE — remove a table

DROP TRIGGER — remove a trigger

DROP TYPE — remove a user-defined data type

DROP USER — remove a database user account

DROP VIEW — remove a view

END — commit the current transaction

EXECUTE — execute a prepared query

EXPLAIN — show the execution plan of a statement

FETCH — retrieve rows from a table using a cursor

GRANT — define access privileges

INSERT — create new rows in a table

LISTEN — listen for a notification

LOAD — load or reload a shared library file

LOCK — explicitly lock a table

MOVE — position a cursor on a specified row of a table

NOTIFY — generate a notification

PREPARE — create a prepared query

REINDEX — rebuild corrupted indexes

RESET — restore the value of a run-time parameter to a default value

REVOKE — remove access privileges

ROLLBACK — abort the current transaction

SELECT — retrieve rows from a table or view

SELECT INTO — create a new table from the results of a query

SET — change a run-time parameter

SET CONSTRAINTS — set the constraint mode of the current transaction

SET SESSION AUTHORIZATION — set the session user identifier and the current user identifier of the current session

SET TRANSACTION — set the characteristicsof the current transaction

SHOW — show the value of a run-time parameter

START TRANSACTION — start a transaction block

TRUNCATE — empty a table

UNLISTEN — stop listening for a notification

UPDATE — update rows of a table

VACUUM — garbage-collectand optionally analyze a database


Wednesday, 16 October 2013

Food Exportation is a serious business

images (29)


Making money via  has been made easy…


Yes of course, anybody can participate;  you only need to sign-up a FREE account with us @ www.agrocash.com and a bank account to withdraw your earned money. So easy as ABC.


You can start as little as N1000, various plans exist though. Register on site http://www.agrocash.com/register.php to get started.


Sunday, 22 September 2013

How to find IP Address of the Sender in Gmail

1. Log into your Gmail account with your username and password.


2. Open the mail.


3. To display the headers,


* Click on More options corresponding to that thread. You should get a bunch of links.


* Click on Show original


4. You should get headers like this:

Gmail headers : name

Look for Received: from followed by a few hostnames and an IP address between square brackets. In this case, it is 10.182.181.35

That is be the IP address of the sender!


5. Track the IP address of the sender

When you receive an email, you receive more than just the message. The email comes with headers that carry important information that can tell where the email was sent from and possibly who sent it. For that, you would need to find the IP address of the sender.


Note that this will not work if the sender uses anonymous proxy servers.


Wednesday, 11 September 2013

How to Chat With Command Prompt (Ms DOS)

All you need is your friends IP address and Command Prompt.

First of all, open Notepad and enter:

@echo off

:A

Cls

echo MESSENGER

set /p n=User:

set /p m=Message:

net send %n% %m%

Pause

Goto A

Now save this as “Messenger.bat”. Open the .bat file and

open it , in Command Prompt you should see:

MESSENGER

User:

After “User” type the IP address of the computer you

want to contact.

After this, you should see this:

Message:

Now type in the message you wish to send.

Before you press “Enter” it should look like this:

MESSENGER

User: 58.218.143.113


Message: Hi

Now all you need to do is press “Enter”, and start

chatting!


Monday, 9 September 2013

107 Command Prompt Shortcuts

Hello Friends!!!


Here Are A Few Commands For You  To Know…


To Those Who Didn’t Know How To Use Here It Is:


START<RUN<CMD


(OR)


START<SEARCH<CMD

1. Accessibility Controls - access.cpl

2. Accessibility Wizard - accwiz

3. Add Hardware Wizard - hdwwiz.cpl

4. Add/Remove Programs - appwiz.cpl

5. Administrative Tools - control admintools

6. Automatic Updates - wuaucpl.cpl

7. Bluetooth Transfer Wizard - fsquirt

8. Calculator - calc

9. Certificate Manager - certmgr.msc

10. Character Map - charmap

11. Check Disk Utility - chkdsk

12. Clipboard Viewer - clipbrd

13. Command Prompt - cmd

14. Component Services - dcomcnfg

15. Computer Management - compmgmt.msc

16. Control Panel - control

17. Date and Time Properties - timedate.cpl

18. DDE Shares - ddeshare

19. Device Manager - devmgmt.msc

20. Direct X Troubleshooter - dxdiag

21. Disk Cleanup Utility - cleanmgr

22. Disk Defragment - dfrg.msc

23. Disk Management - diskmgmt.msc

24. Disk Partition Manager - diskpart

25. Display Properties - control desktop

26. Display Properties - desk.cpl

27. Dr. Watson System Troubleshooting Utility - drwtsn32

28. Driver Verifier Utility - verifier

29. Event Viewer - eventvwr.msc

30. Files and Settings Transfer Tool - migwiz

31. File Signature Verification Tool - sigverif

32. Findfast - findfast.cpl

33. Firefox - firefox

34. Folders Properties - control folders

35. Fonts - control fonts

36. Fonts Folder - fonts

37. Free Cell Card Game - freecell

38. Game Controllers - joy.cpl

39. Group Policy Editor (for xp professional) - gpedit.msc

40. Hearts Card Game - mshearts

41. Help and Support - helpctr

42. HyperTerminal - hypertrm

43. Iexpress Wizard - iexpress

44. Indexing Service - ciadv.msc

45. Internet Connection Wizard - icwconn1

46. Internet Explorer - iexplore

47. Internet Properties - inetcpl.cpl

48. Keyboard Properties - control keyboard

49. Local Security Settings - secpol.msc

50. Local Users and Groups - lusrmgr.msc

51. Logs You Out Of Windows - logoff

52. Malicious Software Removal Tool - mrt

53. Microsoft Chat - winchat

54. Microsoft Movie Maker - moviemk

55. Microsoft Paint - mspaint

56. Microsoft Syncronization Tool - mobsync

57. Minesweeper Game - winmine

58. Mouse Properties - control mouse

59. Mouse Properties - main.cpl

60. Netmeeting - conf

61. Network Connections - control netconnections

62. Network Connections - ncpa.cpl

63. Network Setup Wizard - netsetup.cpl

64. Notepad - notepad

65. Object Packager - packager

66. ODBC Data Source Administrator - odbccp32.cpl

67. On Screen Keyboard - osk

68. Outlook Express - msimn

69. Paint - pbrush

70. Password Properties - password.cpl

71. Performance Monitor - perfmon.msc

72. Performance Monitor - perfmon

73. Phone and Modem Options - telephon.cpl

74. Phone Dialer - dialer

75. Pinball Game - pinball

76. Power Configuration - powercfg.cpl

77. Printers and Faxes - control printers

78. Printers Folder - printers

79. Regional Settings - intl.cpl

80. Registry Editor - regedit

81. Registry Editor - regedit32

82. Remote Access Phonebook - rasphone

83. Remote Desktop - mstsc

84. Removable Storage - ntmsmgr.msc

85. Removable Storage Operator Requests - ntmsoprq.msc

86. Resultant Set of Policy (for xp professional) - rsop.msc

87. Scanners and Cameras - sticpl.cpl

88. Scheduled Tasks - control schedtasks

89. Security Center - wscui.cpl

90. Services - services.msc

91. Shared Folders - fsmgmt.msc

92. Shuts Down Windows - shutdown

93. Sounds and Audio - mmsys.cpl

94. Spider Solitare Card Game - spider

95. SQL Client Configuration - cliconfg

96. System Configuration Editor - sysedit

97. System Configuration Utility - msconfig

98. System Information - msinfo32

99. System Properties - sysdm.cpl

100. Task Manager - taskmgr

101. TCP Tester - tcptest

102. Telnet Client - telnet

103. User Account Management - nusrmgr.cpl

104. Utility Manager - utilman

105. Windows Address Book - wab

106. Windows Address Book Import Utility - wabmig

107. Windows Explorer - explorer.


How to Crack a Password-Protected Zip File

Today we’re going to teach you how to effectively crack password protected .zip files in Backtrack 5 or Kali Linux.


The steps to cracking are listed below.


* Open ‘fcrackzip’

alright once you’re booted in Kali or BT5 go over and find ‘fcrackzip’. once open, type in “fcrackzip -b -c a -l 5 -5 -u


‘zip_file_location’” ( of course replacing zip_file_location with the actual location of the .zip file ) press Enter, and the password should be cracked.


For ease of use when filling in the .zip file location just drop the .zip file in the terminal right when you’re supposed to type the


location.


How to Restart without turning off your PC

What if we are in the middle of some important work and system crashed but we have no time for a rebooting? Here is an easy method.


First start ‘Task Manager.


Go to ‘Process’ tab & select ‘explorer.exe’.


Right click on it & select ‘End Process Tree’ (By then all the windows & desktop icons will disappear, except Task Manager).


Go to ‘File’ menu of the ‘Task Manager’ & select ‘New Task (Run…)’.


Type ‘explorer.exe’ (Without the quotes) & press ENTER.


Now all the non responding programs will end & desktop icons reappear.


We can even access our CD or DVD now(In case it is stuck).


Now the system is fresh again without the much time consuming ‘reboot’.


Sunday, 8 September 2013

How to Break WEP Encryption

1. Start Wireless Interface in monitor mode ( ex Mon0)


2. Test Injection Capability of the wireless device to the Access Point Use A tool Such As ( Aireplay-ng ) to do a Fake Authentication wit d access point


3.Start Wi-fi Sniffing Tool Such As ( Airodump-ng ) Or ( Cain-&Abel ) With A bssid Filter to Collect Unique IVs


4.Start A Wi-fi Packet Encryption Tool Such as (Aireplay-ng) in ARP

request replay mode to inject Packets


5. Run Cracking Tool Such As Cain and Abel or Aircrack-ng to Extract Encrypt key From IVs


Some Advice For Who Want To Become A Hacker.

1) Never trust sites that ask you for money in return of Hacking Software’s or who claim to Hack Email Id’s in return of money. All such things are Scam . Nothing Works.


2) There is NO DIRECT SOFTWARE to Hack Facebook , Google , Yahoo or any other big website. All the software’s that claim to do so are scam. They are just meant to take your money and in worse cases, those software’s have Trojans or key loggers in them. As a result your account gets hacked trying to hack others.


3) NEVER EVER use the keyloggers or Trojans you find as freeware on internet. Hackers are not fools. They compile keyloggers and Trojans almost with any such software and when you install them , you are already hacked before even trying to hack others.


4) You are never going to be a good hacker without the knowledge of programming and scripting languages. When you are going to use only ready made software’s and would depend on them for hacking anything then your functionality would be limited up to the functionality of the software. When you are not going to use your brain , just doing the copy paste thing, then how can you even think of being a good hacker.


5) If you are a good Hacker, you already become a good programmer , a good script writer , a good web developer and an excellent security expert. Well any good Hacker will/should have good knowledge of various aspects and programming languages. to do XSS (Cross Site Scripting ) , PHP INJECTION , SQL INJECTION , PHISHING , FOOT-PRINTING etc… you will have to be good at programing and scripting. And when you know the Various loop holes , vulnerabilities and security tips, you already become a Computer Security Expert.


So Never Ever Under estimate the term Hacker.


A Hacker Is Not a person who just hacks email id’s or servers but a True Hacker is a Computer Genius who the knowledge of computers more than anyone.


Thursday, 29 August 2013

Hello World!!!

Hello World!!!


Why don’t you like,comment,share our posts. When we post the new stuff we only get 150-200 likes and when we post old posts which you know already we get 400-500 likes on that.


Should we Stop Posting New stuff ? if I may ask and start posting all the old posts.


Start Liking, Sharing Our Posts. we spend our all time for you all but we didn’t get the expected response from your side.


Start Liking and Sharing our all posts


Wednesday, 28 August 2013

How to freeze computer(s) in seconds

Today we are going to show you a few lines of batch scripting which can freeze or crash your PC in just a matter of seconds. But before going on to the we will explain how the program works.


First of all when you open the batch file it will go into an infinite loop. Inside the loop the batch file will do two things. First it will open three cmd windows which will remain but will take up RAM space. Second the batch file will open itself three times meaning the batch file will create extra three sessions of itself.


These three sessions will continue on the same loop which will open it self again and again thus creating a great infinite web of cmd sessions. In just a few SECONDS after opening the batch file your PC will freeze. There is no time to use the task manager to another tool to kill the processes. The only way is using the restart button on your CPU to restart the PC.


To make the batch file paste the following code into notepad and save as a Expert.bat EXACTLY. Do not name it anything else.


ECHO OFF

:START

START & START & START

Expert.bat

Expert.bat

Expert.bat

GOTO START

By the way this is not a dangerous virus so you can try it on your PC and give it to your friends. Stay tuned for more great posts and remember to leave your ratings and comments. Like our Facebook page and remember to subscribe to the blog.


Monday, 26 August 2013

How to Crack and Edit Encrypted PDF file!!!


Do you have any PDF file which cannot be printed, copied, or edited? Your PDF file has password security and other restrictions added. The following Websites Are Tested By clickermotics

Try to crack a pdf in windows using the options below.


1. Freemypdf.com


http://freemypdf.com/ is a free website that allows you to view restricted Pdf files.Use this site to remove passwords and restrictions (such as printing, copying text, etc.) from PDFs.

Note: This only works for PDF FILE that you open and read without any Third party plugins. PDF file that require a password to be viewed cannot be unlocked by this service. This is because this is not cracking. Viewable PDFs with restrictions are not really protected, no more than a door with a broken lock, as opposed to password-protec ted PDFs.


2. PDFCrack


http://www.pdfcrack.com/


PDFCrack! is a free online PDF cracker. No installation, no registration, it’s free and easy to use.


3.Crack My


http://www.crackmypdf.com/


CrackMyPDF is a free online PDF unlocker. Unlock PDF file and remove restriction for editing, copying, printing and extracting with just few clicks.


4.PDF Unlock Online Utility http://www.ensode.net/pdf-crack.jsf


Sunday, 25 August 2013

How to use on-screen keyboard for secured typing.


If u want to log in to your online bank account or some thing else confidential and to not get hacked by key loggers


-Press start button goto Run


-Type osk


-Press Enter


Wednesday, 21 August 2013

How Touchscreen Works

A touchscreen is an electronic visual display that the user can control through simple or multi-touch gestures by touching the screen with one or more fingers. Some touchscreens can also detect objects such as a stylus or ordinary or specially coated gloves.


Touchscreens are common in devices such as game consoles, all-in-one computers, tablet computers, and smartphones. They also play a prominent role in the design of digital appliances such as personal digital assistants (PDAs), satellite navigation devices, mobile phones, and video games.


Working of Touch Screen Are very Interesting. Here’s How they Work:


There are three basic systems of Touch Screen:


1. Resistive System

2. Capacitive System

3. Surface Wave acoustic


The RESISTIVE SYSTEM consists of a normal glass panel that is covered with a conductive and a resistive metallic layer. These two layers are held apart by spacers, and a scratch-resistant layer is placed on top of the whole setup. An electrical current runs through the two layers while the monitor is operational. When a user touches the screen, the two layers make contact in that exact spot. The change in the electrical field is noted and the coordinates of the point of contact are calculated by the computer. Once the coordinates are known, a special driver translates the touch into something that the operating system can understand.


Working Of Resistive Touch Screen !!!


In the CAPACITIVE SYSTEM, a layer that stores electrical charge is placed on the glass panel of the monitor. When a user touches the monitor with his or her finger, some of the charge is transferred to the user, so the charge on the capacitive layer decreases. This decrease is measured in circuits located at each corner of the monitor. The computer calculates, from the relative differences in charge at each corner, exactly where the touch event took place and then relays that information to the touch-screen driver software. One advantage that the capacitive system has over the resistive system is that it transmits almost 90 percent of the light from the monitor, whereas the resistive system only transmits about 75 percent. This gives the capacitive system a much clearer picture than the resistive system


Working Of Capacitive Touch Screen !!!


The SURFACE WAVE ACOUSTIC SYSTEM works with help of wave energy. This enables a touch to transform into another form of energy and deliver the command which in response perform the desired action. A Pair of transducers is placed on glass plate sides. In the Glass Plates there are reflectors. On touching the screen wave produced and which transforms into energy for fulfilling the command. It tells where on the screen touch is detected.


Friday, 9 August 2013

How to get FREE Recharge Cards...(REAL)

Besides FREE SMS on our BLOG. FREE recharge cards would be posted in our chat room periodically…So enter the room now: @ http://www.chat.clickermotics.com/


Wednesday, 7 August 2013

How to access any PC without knowing the password.

As you know,getting inside someones pc to which we even have physical access isnt an easy task.Most of them will be password protected.So here’s a simple tool that will help you to get access.


It is KON BOOT (google it).


Rather than cracking a Windows password, KON-BOOT bypasses it and lets you into the computer without typing one in. Then, when you restart, everything is back to normal, that is, everything you didn’t change when you were inside Biggrin


No need of any pro knowledge required.Just download this tool.


Burn to a disk or setup live usb.Plug it into to victim pc.


Start the computer.


You’ll see the screen of Kon boot and it’ll restart.Then there’ll be no password for logging in.


After doing your works,restart again and there’ll be password as before and no one know..that you were inside.


It is that simple to use.


Enter the Chat Room

Send free SMS, Download Ebooks, Get latest Computer Safety tips , Anti Hacking Tips , Cyber Security Tips & Lots more!!!

Click here to enter the chat room now http://www.chat.clickermotics.com/


Tuesday, 6 August 2013

HOW TO INCREASE YOUR MEMORY CARD FROM 1GB TO 2GB WITHOUT BUYING NEW ONE

You just have to follow the given instructions to upgrade your card. After completing the procedure, you will be amazed to see that your 1GB card is storing data according to 2GB

memory. Before following the instructions, make sure that you have a 1GB memory card because the application works only on 1GB cards.


Flow this instruction


1. Insert the memory card toyour PC.

2. Keep a back up of all the data from the memory card, because

first you have to format the card.

3. Download and install Skymedi software(google it )

4. After installation, the application will launch showing a windows with options “Fix” and “Cancel”. From the drop down menu, you haveto browse the memory card.

5. Once you select the location of the card, click on “Fix”,it will ask you for the confirmation, have to click on “Yes”. After selecting the memory card, the application will show you a size of around 955MB; this is because you have inserted a 1GB memory card.

6. After finishing the process, the application will ask youto unplug the memory card. Remove it and insert it again. Now the storage capacity of the memory card is increased to 2GB.

7. If you want to check the storage of the memory card you can click on My computer –> Memory card –> SelectProperties. You will see that the size of the memory cardis 2GB. If you are using Windows Vista7, you will see

“Computer” instead of “My computer”. Open that right clicks on the memory card, select properties and you will

be able to check the size of the memory card.

8. There is one more way to confirm the storage capacity. Reopen the Skymedi and select the location of the memory card. This time it will show 1912KB, which is 2GB.


Saturday, 3 August 2013

INTERNET ERROR CODES


Error 400 – Bad request.

Error 401 -unauthorized request.

Error 403 – forbidden.

Error 404 – Not found.

Error 500 -Internal error.

Error 501 – Not Implemented

Error 502 – Bad Gateway

Error 503 -Service unavailable.

Error 504 – Gateway Time-Out

Error 505 – HTTP Version not supported/DNS Lookup Fail/ unknw host

Error 500-599 – Server Errors.


Friday, 2 August 2013

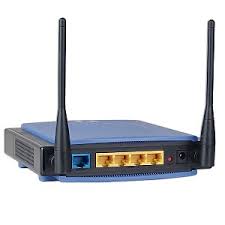
How to configure Router(s)

This post explains how to set up a router for home computer networks. The exact names of configuration settings on a network router vary depending on the model and whether it is wired or wireless. However, this general procedure will guide you through the process for the common kinds of home network equipment.


Choose a convenient location to begin installing your router such as an open floor space or table. This does not need to be the permanent location of the device. Particularly for wireless routers, you may find it necessary to re-position the unit after installing it as the cables / signals may not reach all areas needed. At the beginning, its better to choose a location where it’s easiest to work with the router and worry about final placement later.


Plug in the router’s electrical power source, then turn on the router by pushing the power button.


(Optional) Connect your Internet modem to the router. Most network modems connect via an Ethernet cable but USB connections are becoming increasingly common. The cable plugs into the router jack named “WAN” or “uplink” or “Internet.” After connecting the cable, be sure to power cycle (turn off and turn back on) the modem to ensure the router recognizes it.


Connect one computer to the router. Even if the router is a wireless model, connect this first computer to the router via a network cable. Using a cable during router installation ensures the maximum reliability of the equipment. Once a wireless router installation is complete, the computer can be changed over to a wireless connection if desired.


Open the router’s administration tool. From the computer connected to the router, first open your Web browser. Then enter the router’s address for network administration in the Web address field and hit return to reach the router’s home page.


Many routers are reached by either the Web address “http://192.168.1.1″ or “http://192.168.0.1″ Consult your router’s documentation to determine the exact address for your model. Note that you do not need a working Internet connection for this step.


Log in to the router. The router’s home page will ask you for a username and password. Both are provided in the router’s documentation. You should change the router’s password for security reasons, but do this after the installation is complete to avoid unnecessary complications during the basic setup.


If you want your router to connect to the Internet, you must enter Internet connection information into that section of the router’s configuration (exact location varies). If using DSL Internet, you may need to enter the PPPoE username and password. Likewise, if you have been issued a static IP address by your provider (you would need to have requested it), the static IP fields (including network mask and gateway) given to you by the provider must also must be set in the router.


If you were using a primary computer or an older network router to connect to the Internet, your provider may require you to update the MAC address of the router with the MAC address of the device you were using previously. Read How to Change a MAC Address for a detailed description of this process.


If this is a wireless router, change the network name (often called SSID). While the router comes to you with a network name set at the factory, you will never want to use this name on your network. Read How to Change the Router SSID for detailed instructions.


Verify the network connection is working between your one computer and the router. To do this, you must confirmed that the computer has received IP address information from the router. See How to Find IP Addresses for a description of this process.


(If applicable) Verify your one computer can connect to the Internet properly. Open your Web browser and visit a few Internet sites such as http://compnetworking.about.com/.


Connect additional computers to the router as needed. If connecting wirelessly, ensure the network name (SSID) of each is computer matches that of the router.


Finally, configure additional network security features as desired to guard your systems against Internet attackers. These WiFi Home Network Security Tips offer a good checklist to follow.

Tips:


When connecting devices with network cables, be sure each end of the cable connects tightly. Loose cables are one of the most common sources of network setup problems.

What You Need


A network router (wireless or wired)

Network adapters installed on all devices to be connected to the router

A working Internet modem (optional)

A Web browser installed at least one computer in the network


VARIETIES OF FILE FORMATS

1. TEXT FILES FORMATS:-

.txt Plain Text File

.doc Microsoft Word Document

.docx Microsoft Word Open XML Document

.msg Outlook Mail Message

.wps Microsoft Word Processor Document

.tex LaTex Source Document

.rtf Rich Text File

.log Log File

.pages Pages Document

.odt Open Document Text Document

.wpd Word Perfect Document


2. AUDIO FILES FORMAT:-

.wma Windows Media Audio File

.wav WAVE Audio File

.mid MIDI File

.mp3 MP3 Audio File

.mpa MPEG-2 Audio File

.m4a MPEG-4 Audio File

.m3u Media Playlist File

.iff Interchange File Format

.aif Audio Interchange File Format

.ra Real Audio File


3. VIDEO FILES FORMAT:-

.3gp 3GPP Multimedia File

.3g2 3GPP2 Multimedia File

.wmv Windows Media Video File

.swf Shockwave Flash Movie

.srt SubRip Subtitle File

.rm Real Media File

.mov Apple QuickTime Movie

.mp4 MPEG-4 Video File

.mpg MPEG Video File

.flv Flash Video File

.avi Audio Video Interleave File

.asf Advanced System File

.asx Microsoft ASF Redirector File

.vob DVD Video Object File


4. IMAGE FILES FORMAT:-

.bmp Bitmap File

.dds DirectDraw Surface

.dng Digital negative Image File

.gif Graphical Interchange File Format

.jpg JPEG Image

.png Portable Network Graphic

.psd Adobe Photoshop Document

.pspimage PaintShop Pro Image

.tga Targa Graphics

.thm Thumbnail Image File

.tif Tagged Image File

.yuv YUV Encoded Image File


5. 3-D IMAGE FILES FORMAT:-

.3dm Rhino 3D Model

.3ds 3D Studio Scene

.max 3ds Max Scene File

.obj WaveFront 3D Object File


6. EXECUTABLE FILES FORMAT:-

.apk Android Package File

.app Mac OS X Application

.bat DOS Batch File

.cgi Common Gateway Interface Script

.com DOS Command File

.exe Windows Executable File

.gadget Window Gadget

.jar Java Archive File

.pif Program Information File

.vb VBScript File

.wsf Windows Script File


7. WEB FILE FORMAT:-

.asp Active Server Pages

.aspx Active Server Pages Extended

.cer Internet security File

.cfm ColdFusion Markup File

.csr Certificate Signing Request File

.css Cascading Style Sheet

.htm HyperText Markup Language

.html HyperText Markup Language

.js JavaScript File

.jsp Java Server Pages

.php PHP source Code File

.rss Rich Site Summary

.xhtml Extended HyperText Markup Language


8. COMPRESSED FILE FORMAT:-

.7z 7-zip Compressed File

.cbr Comic Book RAR Archive

.deb Debian Software Package

.gz Gnu Zipped Archive

.pkg Mac OS X Installer Package

.rar WinRAR Compressed Archive

.rpm Red Hat Package Manager File

.sit Stufflt Archive

.sitx Stufflt X Archieve

.tar.gz Compressed Tarball File

.zip Zipped File

.zipx Extended Zipped File